Welcome to the exciting world of building AI models! If you’ve ever trained a model in a Jupyter notebook and wondered, “What now?”, this guide is for you. Building a real-world AI application is a marathon, not a sprint, and the journey from a promising prototype to a reliable, live system is called the end-to-end (E2E) workflow.
This roadmap will walk you through each stage, highlight common pitfalls that trip up beginners (and professionals!), and equip you with the knowledge to navigate the process successfully. Let’s break it down into two major phases: Training and Deployment & Beyond.
Phase 1: The Training Ground – From Idea to Trained Model
This phase is about creating your best possible model in a controlled, experimental environment.
Step 1: Problem Definition & Data Collection
- The Goal: Before writing a single line of code, clearly define what you want your model to do. Is it classifying emails as spam/not spam? Predicting house prices? Frame it as a specific machine learning task (classification, regression, etc.).
- Pitfall Alert: “Solution Looking for a Problem.” Don’t start with a cool model (like a transformer) and try to force it onto a problem. Start with the business/user problem first.
- Data is King: Your model learns from data. You need a relevant, representative dataset. Sources can be public (Kaggle, UCI), internal company data, or data you collect.
- Pitfall Alert: “Garbage In, Garbage Out.” If your data is biased, incomplete, or doesn’t reflect real-world conditions, your model will fail, no matter how advanced your algorithms are.
Step 2: Data Preparation & Exploration
This is arguably the most important step, often taking 60-80% of the project time.
Clean:
Handle missing values, remove duplicates, correct errors.
Explore (EDA – Exploratory Data Analysis):
Use statistics and visualizations to understand your data’s distributions, relationships, and potential anomalies.
Preprocess:
Format data for the model. This includes:
- Numerical Data: Scaling (e.g., StandardScaler) or normalizing.
- Categorical Data: Encoding (e.g., One-Hot Encoding).
- Text/Image Data: Tokenization, resizing, normalization.
Split:
Always split your data into three sets before any model training:
- Training Set: For the model to learn from.
- Validation Set: For tuning model hyperparameters during development.
- Test Set: For the final, one-time evaluation of your fully-trained model. Lock it away and don’t peek!
Step 3: Model Selection & Training
- Start Simple: Begin with a straightforward, interpretable model (like Linear Regression for predictions or Logistic Regression for classification). It sets a performance baseline.
- Iterate: Experiment with more complex models (Random Forests, Gradient Boosting, Neural Networks) to see if performance improves.
- Train: Feed the training data to the model so it can learn the patterns. This is where you “fit” the model.
- Pitfall Alert: “Overfitting.” This is when your model memorizes the training data (including noise) but fails to generalize to new data. Signs: Perfect training accuracy but poor validation accuracy. Combat this with techniques like cross-validation, regularization, and getting more data.
Step 4: Evaluation & Validation
- Use the Right Metrics: Accuracy is not always king! For imbalanced datasets (e.g., 99% “not spam,” 1% “spam”), use Precision, Recall, F1-Score, or AUC-ROC.
- Validate on the Validation Set: Use this set to tune hyperparameters (like learning rate, tree depth) and choose between different models. The model that performs best on the validation set is your candidate.
- The Final Exam – Test Set: Only after you’ve completely finished model selection and tuning do you run your final candidate model on the held-out test set. This gives you an unbiased estimate of how it will perform in the real world.
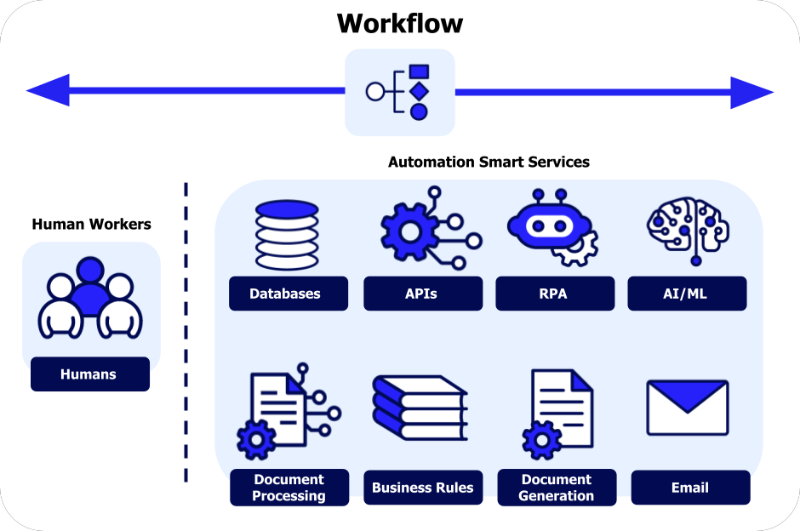
Managing this experimental phase can become chaotic quickly—tracking different datasets, model versions, hyperparameters, and metrics. This is where platforms like Whaleflux add tremendous value for beginners and teams. Whaleflux helps you organize the entire training lifecycle, automatically logging every experiment, dataset version, and code state. It turns your ad-hoc notebook trials into a reproducible, traceable scientific process, making it clear which model version is truly your best and exactly how it was built.
Phase 2: Deployment & Beyond – Launching Your Model to the World
A model in a notebook is a science project. A model served via an API is a product.
Step 5: Model Packaging & Preparation
Export the Model:
Save your trained model in a standard, interoperable format. Common choices include:
- Pickle (
.pkl) / Joblib: Simple for scikit-learn models. - ONNX: A universal format for exchanging models between frameworks.
- Framework-Specific:
.h5for Keras,.ptfor PyTorch,.pbfor TensorFlow.
Package the Environment:
Your model relies on specific library versions (e.g., scikit-learn==1.2.2). Use a requirements.txt file or a Docker container to encapsulate everything needed to run your model, ensuring it works the same everywhere.
Step 6: Building the Inference Service
- The Goal: Create a reliable interface for your model, typically a web API (using frameworks like FastAPI or Flask in Python).
- What it Does: The API receives input data (e.g., a JSON request with house features), loads the model, runs prediction (inference), and returns the result (e.g., predicted price).
- Pitfall Alert: “It Works on My Machine!” The deployment environment (cloud server, Docker container) must perfectly mirror your training environment to avoid mysterious failures.
Step 7: Deployment & Serving
Choose a Deployment Target:
- Cloud Platforms (AWS SageMaker, GCP Vertex AI, Azure ML): Managed services that simplify deployment.
- Serverless (AWS Lambda): Good for sporadic, low-latency requests.
- Container Orchestration (Kubernetes): For scalable, robust deployment of multiple models.
- Edge Device: Deploying directly on a phone or IoT device for low-latency, offline use.
Serving:
This is where your model API is hosted and made accessible to users or other applications.
Step 8: Post-Deployment – The Real Work Begins
Monitoring: You must monitor:
- System Health: Is the API up? Latency, throughput.
- Model Performance: Data Drift (Has the input data distribution changed?) and Concept Drift(Has the real-world relationship between input and output changed?). A drop in live accuracy is a key signal.
Logging:
Log all predictions (with anonymized inputs) to track performance and debug issues.
Pitfall Alert:
“Deploy and Forget.” Models degrade over time as the world changes. Without monitoring, you won’t know until it’s too late.
The CI/CD Loop:
The best teams set up a Continuous Integration/Continuous Deployment (CI/CD) pipeline for models. This automates testing, packaging, and safe deployment of new model versions, allowing for seamless updates and rollbacks.
Putting It All Together
The end-to-end workflow is a cycle, not a straight line. Insights from monitoring (Step 8) feed back into new data collection and problem definition (Step 1), starting the loop again. As a beginner, your goal is to understand this entire landscape. Start by completing a full cycle on a small project using a managed cloud service to handle the complex deployment infra.
Remember, building AI is an iterative engineering discipline. Embrace the process, learn from the pitfalls, and celebrate getting your first model to reliably serve predictions in the real world—it’s a fantastic achievement.
FAQs
1. What programming language and math level do I need to start?
Start with Python. It has the dominant ecosystem (libraries like scikit-learn, TensorFlow, PyTorch). For math, a solid grasp of high-school algebra (functions, graphs) and basic statistics (mean, standard deviation) is enough to begin. You’ll learn more advanced concepts (like gradients) as you need them, through practical implementation.
2. How long does it take to go from training to deployment for a first project?
For a simple model (like a scikit-learn classifier on a clean dataset), a motivated beginner can go from notebook to a basic deployed API in a weekend or two. The bulk of the time will be learning deployment steps, not the model training itself. Start extremely small to complete the full cycle.
3. What’s the biggest mistake beginners make after training a good model?
Assuming the job is done. The “deployment gap” is real. Failing to plan for how the model will be integrated into an application, how it will be served efficiently, and how its performance will be monitored post-launch are the most common points of failure.
4. Do I need to be a DevOps expert to deploy a model?
Not necessarily. Cloud-managed ML services (like those from AWS, Google, Microsoft) abstract away much of the DevOps complexity. They provide guided paths to deploy a model with an API endpoint with just a few clicks. As you scale, DevOps knowledge becomes crucial, but you can start with these managed tools.
5. How do I know if my model is “good enough” to deploy?
It’s a trade-off. Evaluate based on: 1) Test Set Performance: Does it meet your minimum accuracy or performance threshold? 2) Business Impact: Will it provide tangible value, even if it’s imperfect? 3) Cost of Being Wrong: For a low-stakes application like a casual recommendation system, you can launch earlier with a lower bar. For a high-stakes application like a medical diagnostic tool, the bar must be exceptionally high. Often, a simple and robust model in production is far better than a complex, fragile one stuck in a notebook.