Large Language Models (LLMs) have revolutionized how businesses operate—from powering customer service chatbots to generating technical documentation and even aiding in scientific research. But here’s the catch: training a state-of-the-art LLM (like GPT-4 or Llama 3) is just the first step. The real challenge comes when you need to serve that model to hundreds, thousands, or even millions of users reliably.
Think about it: A single LLM query might seem simple, but behind the scenes, it requires massive computational power—especially for large models with billions of parameters. If you’ve ever tried to run a 70B-parameter model on a single laptop, you know it’s nearly impossible. Even with a powerful GPU, serving more than a handful of users at once leads to slow response times, crashes, or sky-high cloud bills.
While popular frameworks like PyTorch or TensorFlow handle model training and basic inference, deploying LLMs at scale to serve real users requires more than just software—it needs robust, optimized infrastructure. This is where WhaleFlux steps in: as an intelligent GPU resource management tool designed specifically for AI enterprises, it provides the foundational hardware and management capabilities to turn LLM models into stable, efficient production services.
Part 1. Foundational Concepts: LLMs and Machine Learning Inference
Before diving into deployment, let’s clarify two key terms: LLMs and inference—since these are the building blocks of everything we’ll cover.
What Are Large Language Models (LLMs)?
In simple terms, LLMs are AI models trained on enormous amounts of text data (books, websites, articles, etc.) to understand and generate human-like language. They learn patterns, grammar, and even context, allowing them to answer questions, write essays, summarize documents, or hold conversations. Examples include OpenAI’s GPT series, Meta’s Llama, and Google’s PaLM.
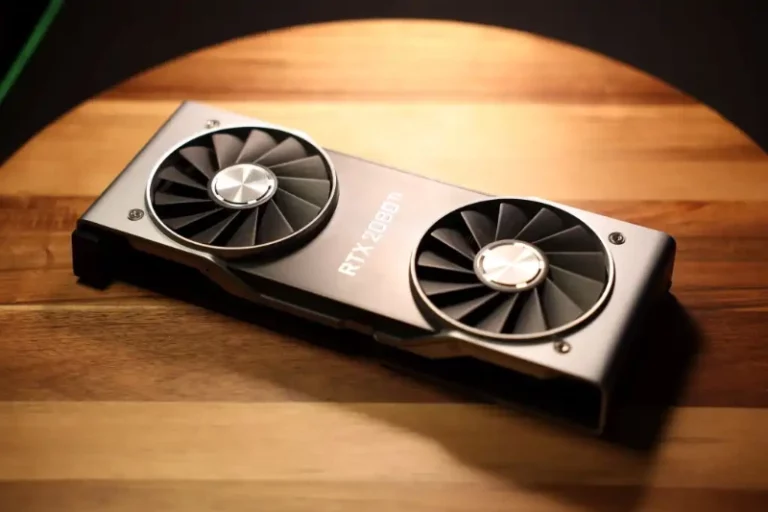
What makes LLMs unique (and challenging to deploy) is their size: a typical large LLM has 10B to 1T+ parameters (the “knobs” the model adjusts during training). Storing and running these parameters requires specialized hardware—most often high-performance GPUs.
What Is Inference in Machine Learning?
If training is the process of “teaching” a model to learn from data, inference is the process of “using” that knowledge to make predictions on new data. For LLMs, this means taking a user’s input (e.g., “Write a marketing email for a new product”) and generating a response—that response is what we call a “sentence of inference.”
Here’s how inference differs from training:
| Aspect | Training | Inference |
| Resource Needs | Requires massive data and long compute time (days/weeks) | Needs fast, consistent compute (milliseconds/seconds per request) |
| Goal | Teach the model to learn patterns | Generate accurate, low-latency responses |
| Hardware Focus | Maximize model accuracy | Maximize throughput (requests per second) and minimize latency |
For LLMs, inference is where the rubber meets the road—and where multi-machine setups and tools like WhaleFlux become critical.
Part 2. Why Use Multiple Machines for LLM Inference?
You might be wondering: Why not just use a single powerful GPU for inference? For small models or low user counts, that works. But as your user base grows or your model gets larger, a single machine quickly hits limits. Here are the four biggest reasons to use multi-machine inference:
1. Handling Model Size
Many modern LLMs are too large to fit on a single machine’s memory. For example, a 175B-parameter model in FP16 precision (a common format for inference) requires ~350GB of memory—far more than even a top-tier GPU like the NVIDIA H100 (which has 80GB of HBM3 memory).
With multi-machine deployment, you can split the model across multiple GPUs (e.g., 5 H100s) so each machine handles a portion of the parameters. This “model parallelism” makes it possible to run even the largest LLMs.
2. Increasing Throughput
Throughput is the number of inference requests your system can handle per second. If you’re serving a chatbot to 1,000 concurrent users, a single GPU might only process 10 requests/sec—leading to long wait times.
Multi-machine setups let you distribute requests across multiple GPUs (this is called “data parallelism”). For example, 10 machines with NVIDIA A100 GPUs could process 100 requests/sec—enough to keep up with your user base without delays.
3. Improving Reliability
Imagine if your only inference machine crashes during a peak usage time (e.g., a Black Friday sale for your e-commerce chatbot). Your service would go down, leading to lost sales and frustrated users.
Multi-machine deployments eliminate single points of failure. If one machine goes offline, the others automatically pick up the load. This is critical for mission-critical services where downtime is not an option.
4. Reducing Latency
Latency is the time it takes for the model to generate a response (from user input to output). For use cases like real-time chat or voice assistants, even a 1-second delay can hurt user experience.
By placing inference machines in multiple geographic regions (or “edge” locations), you can serve users from the machine closest to them. For example, a user in Europe would get responses from a European server, while a user in Asia uses an Asian server—cutting latency from 500ms to 50ms.
Part 3. How to Deploy a Machine Learning Model: A Step-by-Step Framework
Deploying an LLM at scale isn’t just about throwing more GPUs at the problem—it requires a structured approach. Here’s a 4-step framework to turn your trained model into a production-ready service:
1. Model Preparation
First, you need to package your model so it’s ready for inference. Key steps include:
- Convert to an inference-optimized format: Formats like ONNX (Open Neural Network Exchange) or TensorRT reduce model size and speed up inference. For example, converting a Llama 2 model to ONNX can cut latency by 30%.
- Version control: Use tools like DVC (Data Version Control) or Git LFS to track model versions. This lets you roll back to an older version if a new update causes issues.
- Test locally: Run a few inference tests on your laptop or a single GPU to ensure the model works as expected (e.g., “Does it generate coherent responses?” “Is the latency acceptable?”).
2. Environment Configuration
Next, set up the software environment for your inference machines. This ensures consistency across all machines (no more “it works on my laptop” issues). Key tasks:
- Install dependencies: Use conda or pip to install frameworks (PyTorch, TensorFlow), inference libraries (TensorRT, ONNX Runtime), and web servers (FastAPI, Flask).
- Standardize environments: Use Docker to package your model, dependencies, and code into a single “container.” This way, every machine runs the exact same software.
- Optimize for GPUs: Ensure your environment is configured to use GPUs (e.g., install NVIDIA CUDA Toolkit) and that frameworks are GPU-accelerated.
3. Service Design
Now, turn your model into a service that users can access. This means creating an API (Application Programming Interface) for inference requests. Key steps:
- Choose an API framework: FastAPI is a popular choice for LLMs because it’s fast, supports async requests, and auto-generates documentation. For example, you could create an endpoint like /v1/llm/infer that accepts user input and returns the model’s response.
- Add request validation: Ensure incoming requests are formatted correctly (e.g., “Is the input text under 1,000 characters?”) to avoid crashes.
- Handle batching: Group multiple inference requests into a single batch to improve throughput. For example, if 10 users send requests at the same time, process them together on one GPU instead of one at a time.
4. Orchestration
Finally, manage the lifecycle of your model—updates, rollbacks, and A/B testing. This is where tools to coordinate multi-machine deployments come in:
- Deploy across machines: Use Kubernetes or Ray to distribute your Docker containers across multiple machines. These tools handle tasks like starting/stopping containers and balancing load.
- Roll out updates safely: Use “canary deployments” to test new model versions on a small subset of users before rolling them out to everyone. If issues arise, roll back to the old version with one click.
- Run A/B tests: Compare two model versions (e.g., “Version A vs. Version B”) to see which generates better responses or has lower latency.
Part 4. Python Machine Learning Model Deployment Strategies
Python is the go-to language for LLM deployment, thanks to its rich ecosystem of tools. Below are the most common strategies for deploying LLMs with Python—focused on scalability and reliability:
1. Web Frameworks: FastAPI or Flask
For simple inference services, FastAPI or Flask are ideal. They let you create lightweight APIs with minimal code.
Example with FastAPI:
from fastapi import FastAPI
import torch
from transformers import AutoModelForCausalLM, AutoTokenizer
app = FastAPI()
model = AutoModelForCausalLM.from_pretrained(“meta-llama/Llama-2-7b-chat-hf”).to(“cuda”)
tokenizer = AutoTokenizer.from_pretrained(“meta-llama/Llama-2-7b-chat-hf”)
@app.post(“/v1/infer”)
async def infer(input_text: str):
inputs = tokenizer(input_text, return_tensors=”pt”).to(“cuda”)
outputs = model.generate(**inputs, max_new_tokens=100)
return {“response”: tokenizer.decode(outputs[0], skip_special_tokens=True)}
FastAPI automatically handles async requests, which is critical for high concurrency. Flask is simpler but slower for large workloads—stick with FastAPI for LLMs.
2. Specialized Libraries: Ray Serve or KServe
For multi-machine deployments, use libraries built for distributed inference.
- Ray Serve: A scalable inference library that works with Ray (a distributed computing framework). It supports model parallelism (splitting models across GPUs) and batching. For example, you can deploy a 70B-parameter model across 10 GPUs and let Ray Serve handle request routing.
- KServe: Built for Kubernetes, KServe simplifies deploying LLMs at scale. It includes features like auto-scaling (adding more machines when traffic spikes) and built-in monitoring.
These libraries save you from writing custom code to manage distributed systems—letting you focus on your model.
3. Containerization: Docker
As mentioned earlier, Docker ensures your model runs the same way on every machine. A typical Dockerfile for an LLM might look like this:
FROM nvidia/cuda:12.1.1-runtime-ubuntu22.04
WORKDIR /app
COPY requirements.txt .
RUN pip install –no-cache-dir -r requirements.txt
COPY model/ ./model/
COPY app.py .
CMD [“uvicorn”, “app:app”, “–host”, “0.0.0.0”, “–port”, “8000”]
This Docker image includes a GPU-optimized OS (Ubuntu with CUDA), your model, and your FastAPI app. You can run it on any machine with Docker and an NVIDIA GPU.
4. Orchestration: Kubernetes
For large-scale deployments (10+ machines), Kubernetes (K8s) is the gold standard. It manages your Docker containers, handles load balancing, and auto-scales based on traffic.
Key Kubernetes features for LLMs:
- Pods: Groups of containers that run together (e.g., one pod per GPU machine).
- Services: Expose your inference API to users and balance traffic across pods.
- Horizontal Pod Autoscaler (HPA): Automatically adds or removes pods based on CPU/GPU usage (e.g., add pods when GPU utilization hits 80%).
While Kubernetes has a steep learning curve, tools like Helm (a package manager for K8s) simplify deployment—you can use pre-built charts for LLMs instead of writing K8s configs from scratch.
Part 5. Implementation Challenges in Multi-Machine LLM Deployment
Deploying LLMs across multiple machines solves many problems, but it also introduces new challenges. Here are the most common ones—and how to mitigate them:
1. Network Latency
When your model is split across multiple machines, those machines need to communicate with each other (e.g., sharing model parameters or intermediate results). This communication takes time, leading to higher latency.
How to fix it:
- Use high-speed networks (100Gbps Ethernet or InfiniBand) between machines.
- Optimize model parallelism: Split the model in ways that minimize communication (e.g., split along layers instead of individual parameters).
- Use tools like WhaleFlux, which optimizes GPU cluster communication to reduce overhead—ensuring your multi-machine setup doesn’t add unnecessary latency.
2. Load Balancing
Distributing inference requests evenly across machines is harder than it sounds. If one machine gets 100 requests while others get 10, you’ll have slow responses and wasted resources.
How to fix it:
- Use Kubernetes Services or cloud load balancers (e.g., AWS ALB) to distribute requests.
- Implement “smart” load balancing: Route requests based on machine load (e.g., send new requests to machines with the lowest GPU utilization).
- WhaleFlux’s intelligent workload distribution feature handles this automatically—it monitors GPU usage across your cluster and sends requests to the most available machines.
3. State Management
Keeping model versions and configurations consistent across all machines is critical. If one machine runs Version 1 of your model and another runs Version 2, users will get inconsistent responses.
How to fix it:
- Use version control for models (DVC, Git LFS) and tag each Docker image with a model version (e.g., my-llm:v1.0).
- Automate deployments: Use CI/CD tools (GitHub Actions, GitLab CI) to ensure all machines get the same model version at the same time.
- Avoid manual changes: Never update a machine’s model or config by hand—always use your orchestration tool (Kubernetes, Ray) to roll out changes.
4. Monitoring and Observability
In a single-machine setup, you can easily track latency or error rates. In a multi-machine setup, you need to monitor every machine—and understand how they interact.
How to fix it:
- Use monitoring tools like Prometheus (to collect metrics) and Grafana (to visualize them). Track key metrics: latency, throughput, GPU utilization, error rates.
- Log everything: Use tools like ELK Stack (Elasticsearch, Logstash, Kibana) to collect logs from all machines. This helps you debug issues (e.g., “Why did this request fail?”).
- Set up alerts: Get notified when metrics go out of bounds (e.g., “Latency > 2 seconds” or “GPU utilization > 90%”).
Part 6. How WhaleFlux Simplifies Large-Scale LLM Deployment
While the software strategies above are crucial, none of them work well without the right hardware. Even the best Kubernetes setup or FastAPI app will struggle if your GPUs are underpowered, misconfigured, or expensive to scale. This is where WhaleFlux’s expertise lies: it provides the optimized GPU infrastructure and management tools you need to make multi-machine LLM deployment seamless.
1. Pre-Configured, Inference-Optimized GPUs
WhaleFlux offers access to top-tier NVIDIA GPUs—specifically chosen for LLM inference:
- NVIDIA H100/H200: The gold standard for large LLMs. With 80GB (H100) or 141GB (H200) of HBM3e memory, they can handle models up to 175B parameters (with model parallelism) and deliver ultra-low latency.
- NVIDIA A100: A versatile option for mid-sized models (7B-70B parameters). It balances performance and cost, making it ideal for teams scaling from small to large deployments.
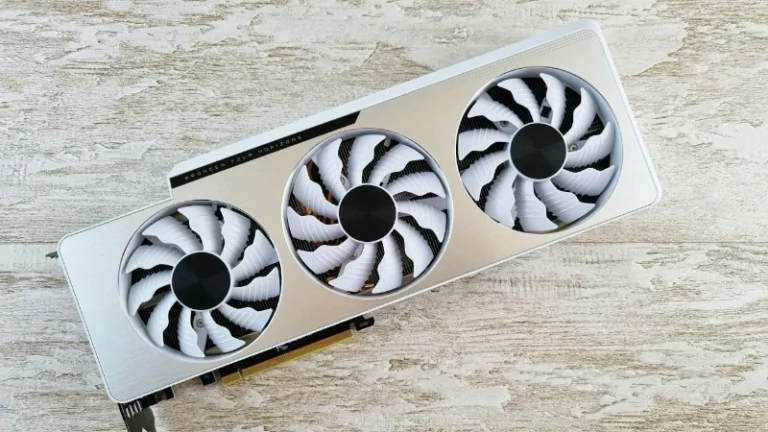
- NVIDIA RTX 4090: A cost-effective choice for lightweight LLMs (1B-7B parameters) or low-traffic use cases.
Every GPU is pre-configured with the latest CUDA toolkit, inference libraries (TensorRT, ONNX Runtime), and drivers—so you don’t waste time on setup. Plug in your model, and you’re ready to go.
2. Unified Cluster Management
Managing a multi-machine GPU cluster manually is a full-time job. WhaleFlux simplifies this with an intuitive management platform that lets you:
- View cluster status: See real-time GPU utilization, latency, and throughput across all machines.
- Deploy models with one click: Upload your Docker image or model files, and WhaleFlux distributes it across your cluster.
- Scale up/down easily: Add more GPUs to your cluster in minutes—no need to negotiate with cloud vendors or wait for hardware delivery.
This unified view eliminates the chaos of managing multiple machines separately. Whether you have 5 GPUs or 50, you can control everything from a single dashboard.
3. Performance Optimization That Saves Time and Money
WhaleFlux’s intelligent workload distribution isn’t just about balancing requests—it’s about maximizing the value of your GPUs. Here’s how it works:
- Dynamic batching: Groups small inference requests into batches to use GPU resources efficiently. For example, instead of processing 1 request at a time on an H100, it processes 10—doubling throughput without increasing latency.
- Model-aware resource allocation: Assigns the right GPU to the right model. For example, it won’t waste an H200 on a 7B-parameter model—instead, it uses an RTX 4090, freeing up the H200 for larger models.
- Energy efficiency: Optimizes GPU power usage to reduce costs. During low-traffic hours, it lowers GPU frequency; during peaks, it ramps up to full performance.
The result? You get 30-50% more throughput from your GPUs compared to a manual setup—meaning you serve more users with fewer resources.
4. Predictable, Cost-Effective Scaling
Cloud vendors often charge by the hour for GPUs—and rates can spike during peak times (e.g., $3-5/hour for an A100). This makes budgeting impossible, and vendor lock-in keeps you stuck with expensive contracts.
WhaleFlux solves this with monthly rental options (no hourly billing, minimum 1 month). This gives you:
- Predictable costs: Know exactly how much you’ll pay each month—no surprises.
- No vendor lock-in: Use your own software stack (Kubernetes, Ray, FastAPI) and switch to other hardware if needed.
- Dedicated resources: Your GPUs are yours alone—no sharing with other users, which means consistent performance (no more “noisy neighbors” slowing down your inference).
For teams deploying LLMs long-term, this is a game-changer. You get the flexibility to scale without the financial stress of hourly billing.
FAQs
1. What are the primary architectural strategies for deploying an LLM across multiple machines for inference?
The main strategies involve a combination of model parallelism and pipeline parallelism distributed across nodes. For inference at scale, a common pattern is to use Tensor Parallelism within a machine (splitting model layers across its local GPUs) and Pipeline Parallelism across machines (assigning different model stages to different servers). Additionally, a distributed inference server architecture is employed, often fronted by a load balancer that routes requests to a cluster of machines, each potentially hosting a replica of the model (hybrid with data parallelism). Implementing this manually is highly complex. WhaleFlux directly addresses this complexity by providing and managing the underlying multi-machine NVIDIA GPU infrastructure (e.g., clusters of H100 or A100 servers) with optimized networking, allowing your deployment tools to focus on the model logic rather than the physical orchestration.
2. What is the most critical infrastructure challenge in multi-machine LLM deployment, and how is it addressed?
The paramount challenge is minimizing inter-machine communication latency and bandwidth bottlenecks. When model layers are split across servers, activations must be transferred over the network between every layer. This makes high-performance interconnects like InfiniBand or advanced RoCE-enabled Ethernet non-negotiable. The performance of even the most powerful NVIDIA H100 GPUs can be severely degraded by slow network links. WhaleFlux is designed for this scale, offering access to compute clusters that are not just composed of top-tier NVIDIA GPUs but are also configured with the low-latency, high-bandwidth networking fabric essential for efficient multi-machine LLM serving, providing a production-ready foundation.
3. How do you choose the right mix of NVIDIA GPUs for different parts of a scaled-out LLM inference cluster?
This involves a performance-per-dollar and workload-matching analysis. For the most communication-heavy nodes (e.g., those in a tensor-parallel group), NVIDIA H100 or H200 GPUswith their ultra-fast NVLink and networking are ideal. For pipeline stages that are less communication-bound, NVIDIA A100s offer excellent balance. For development, testing, or auxiliary services, NVIDIA RTX 4090s provide substantial power at lower cost. Managing this heterogeneity is complex. WhaleFlux simplifies this by providing the full NVIDIA portfolio. More importantly, its intelligent scheduling can help allocate your workload fragments to the most cost-effective GPU type within your purchased or rented cluster, optimizing the overall deployment’s TCO.
4. For a business, is it better to build a private multi-machine GPU cluster or use cloud instances for scaled LLM deployment?
Building a private cluster offers maximum control and potential long-term cost savings for predictable, high-volume workloads but requires massive upfront CapEx and deep operational expertise. Using standard cloud instances offers flexibility but can lead to exorbitant and unpredictable costs at scale, especially with high-end NVIDIA GPUs. WhaleFlux presents a strategic alternative: it allows businesses to rent or purchase a managed, multi-node NVIDIA GPU infrastructure with a minimum monthly commitment. This model provides the hardware performance and control akin to a private cluster while converting costs to a predictable OpEx and eliminating the burdens of physical procurement, setup, and maintenance—ideal for the sustained demands of production LLM inference.
5. What is the role of an orchestration and management platform like WhaleFlux in a scaled multi-machine deployment?
In a multi-machine LLM deployment, the core challenge shifts from model code to infrastructure orchestration, health monitoring, and cost control. An orchestrator like WhaleFlux is the essential control plane. It automates the provisioning and scaling of the NVIDIA GPU node clusters, manages the deployment of inference servers across them, monitors the health and performance of every GPU and network link, and automatically recovers from failures. This ensures high availability, stable performance, and maximizes the utilization of every H100, A100, or other NVIDIA GPU in the fleet. It allows AI teams to focus on the application layer while WhaleFlux ensures the foundational infrastructure is robust, efficient, and cost-effective.